

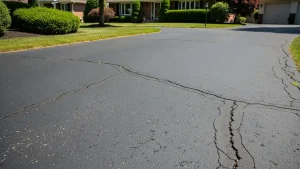


Cracks in your blacktop driveway aren’t just an eyesore—they’re an invitation for water, weeds, and further damage. Left unaddressed, even small fissures can spread into major structural problems that cost thousands to repair.
The good news is most asphalt cracks can be fixed with basic tools, a free weekend, and a little know-how. Whether you’re dealing with hairline fractures or wider gaps, this guide will walk you through everything you need to restore your driveway and protect your investment.
Understanding Asphalt Cracks
Before you grab a bucket of sealant and start patching, it helps to understand what you’re actually dealing with. Not all cracks are created equal, and the type of damage you’re facing determines the repair approach that’ll work best.
Why Do Asphalt Cracks Form?
Asphalt is tough, but it’s not invincible. Temperature swings cause the material to expand in heat and contract in cold, creating stress that eventually leads to cracking. Water is another major culprit—when it seeps beneath the surface and freezes, it expands and lifts the pavement from below.
Heavy loads from vehicles, especially in the same spots repeatedly, can also weaken asphalt. Poor installation, inadequate base material, or improper drainage speed up the process. Even UV rays from the sun break down the binding agents in asphalt, making it brittle over time.
Types of Asphalt Cracks
Identifying the type of crack you’re dealing with is the first step toward an effective repair.
Spider Web or Alligator Skin Cracks
These interconnected cracks resemble alligator skin or a spider web. They usually indicate serious structural problems, often from a weak base or repeated heavy traffic. Small patches can sometimes be repaired, but widespread patterns often require professional resurfacing.
Pencil-Width Small Cracks
Thin hairline cracks are the most common and easiest to fix. They’re typically caused by age, minor temperature fluctuations, or light wear. Catch them early, and a simple crack filler will do the job.
Edge Cracks
Edge cracks run along the perimeter of your driveway, usually where the asphalt meets grass or gravel. They happen when the edges lack proper support or when water pools along the sides.
Wide Cracks (More than 2 Inches)
Large cracks signal significant damage. They allow substantial amounts of water to penetrate, accelerating deterioration. These need more than just filler—you’ll likely need a cold patch or hot asphalt mix.
Linear Cracks
Straight or gently curved cracks that run in a single direction are called linear cracks. They often form along poorly compacted seams or mirror joints in the underlying base layer.
Tools and Materials Needed
Having the right supplies on hand makes the repair process smoother and more effective. You don’t need a contractor’s toolkit, but skipping key items will cost you time and results.
Tools and materials for crack repair
Start with a wire brush or pressure washer to clean out debris. You’ll need a crack filler or asphalt patching compound—liquid crack filler works for narrow cracks, while thicker rubberized sealants or cold patch are better for wider gaps. A caulking gun helps with precise application. Grab a putty knife or trowel for smoothing, a squeegee or brush for spreading sealant, and a tamper to compact patches.
Don’t forget safety gear—gloves, safety glasses, and old clothes. If you’re sealing the entire driveway, you’ll also need asphalt sealer and a long-handled squeegee or brush.
Cold asphalt patch benefits
Cold asphalt patch is a lifesaver for DIYers. Unlike hot asphalt, which requires specialized equipment, cold patch comes ready to use straight from the bag. It’s flexible, adheres well in most weather conditions, and can be applied without professional tools.
A cold patch is ideal for potholes and wide cracks. It compacts under traffic, creating a durable repair that holds up for years when applied correctly.
Preparing for Crack Repair
Preparation is where most DIY repairs succeed or fail. Rushing into the patching phase without proper prep means your repair won’t bond correctly, and you’ll be back out there redoing the work in a few months.
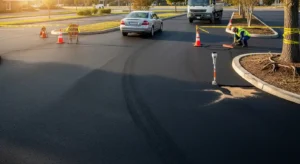
Assessing the damage
Walk your entire driveway and note every crack, pothole, and weak spot. Mark problem areas with chalk or spray paint. Check for soft or sunken areas—these might need more extensive repair than surface cracks.
Cleaning the cracks and surface
Dirt, vegetation, loose asphalt, and old filler must be removed before you apply new material. Use a wire brush, screwdriver, or chisel to dig out debris. A pressure washer is even better—it blasts out hidden dirt and ensures a clean bonding surface.
After cleaning, blow out any remaining dust with a leaf blower or air compressor. The cleaner the crack, the better your filler will adhere.
Ensuring the surface is dry
Moisture is the enemy of asphalt repair. Water prevents sealants and fillers from bonding properly. After cleaning, give the surface at least 24 hours to dry completely. The pavement should feel warm and completely dry to the touch before you proceed.
Best time to repair cracks
Temperature matters. Most crack fillers and sealants work best when applied in temperatures between 50°F and 85°F. Spring and fall are ideal seasons for asphalt repair.
Avoid working right before rain—most products need at least 24 to 48 hours of dry weather to cure. Check the forecast and plan accordingly.
Step-by-Step Crack Repair Process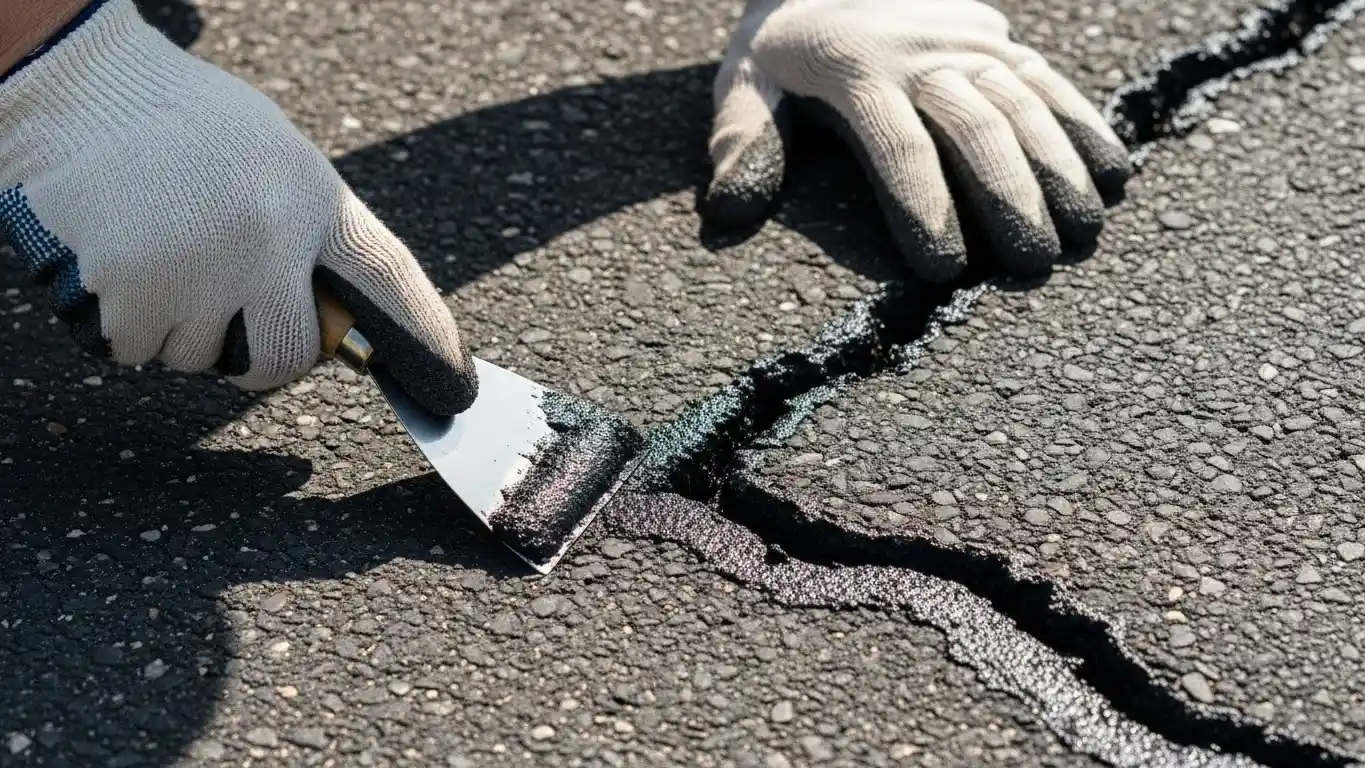
Now comes the hands-on work. Follow these steps in order, and you’ll have a driveway that looks professional and lasts for years.
Clean the driveway
Start with a thorough cleaning of the entire driveway, not just the cracks. Sweep away loose dirt, leaves, and debris. If you have access to a pressure washer, use it to blast away embedded grime, oil stains, and old sealant.
Let everything dry completely. This might take a full day or more depending on weather conditions.
Patch cracks and holes
This is where you address the actual damage. The technique varies depending on crack width.
Filling cracks less than ½ inch
For narrow cracks, use a liquid crack filler or rubberized asphalt sealant. Cut the tip of the applicator at a 45-degree angle. Insert the tip into the crack and squeeze gently, moving along the length in one smooth motion. Overfill slightly—the material will settle and shrink as it cures.
Use a putty knife to smooth the surface and press the filler into the crack. Allow the filler to cure according to manufacturer’s instructions, usually 24 to 48 hours.
Filling cracks more than ½ inch
Wide cracks need more substantial material. Cold asphalt patch or sand-mixed filler works best. Pour the material into the crack, filling it slightly above the surrounding surface. Use a tamper or the flat side of a shovel to compact the material firmly.
For very deep cracks, fill in layers. Add a few inches, compact, then add more until you’re just above surface level.
DIY alligator crack repair
Alligator cracks require extra attention. Remove all loose material from the affected area. Clean thoroughly and let dry. Apply a tack coat of asphalt emulsion to help the new material bond.
Fill the area with a cold patch, overfilling by about half an inch. Compact thoroughly with a tamper, working from the edges toward the center.
Mix and apply sealant
Once all cracks are filled and cured, it’s time to seal the entire driveway. If your sealant comes in concentrated form, mix it according to package directions. Some products come pre-mixed and ready to use.
Pour a line of sealer across the top of your driveway. Use a long-handled squeegee or brush to spread it evenly, working in overlapping sections.
Seal edges by hand
Edges require special attention since they’re vulnerable to damage. Use a handheld brush to carefully apply sealant along the perimeter where your driveway meets grass, gravel, or garage floors.
Pour sealant along the edge
After hand-brushing the immediate edge, pour a thin line of sealant along the perimeter. Use your brush to feather it into the main sealed area, blending the edge work with the rest of the driveway.
Apply a second coat
One coat of sealer works, but two coats are better. Wait for the first coat to dry completely—usually 24 hours. Apply the second coat perpendicular to the first for maximum coverage. Keep traffic off the driveway for at least 48 hours after the second coat.
Tips for Effective DIY Crack Repair
Even with the right materials and process, small details can make or break your repair job. Here are some pro tips that separate amateur patches from repairs that last.
Let the area cure properly
Patience is your friend. Rushing back onto a freshly repaired driveway before it’s fully cured will ruin your work. Most crack fillers need 24 to 48 hours, but sealcoats can take up to 72 hours in cooler weather. Avoid foot and vehicle traffic during this time.
Topping with sand if needed
In humid conditions or if you applied sealant a bit too thick, topping with sand prevents tracking. Lightly sprinkle fine sand over the wet sealant. The sand absorbs excess moisture and provides texture, reducing the chance of footprints or tire marks.
Common mistakes to avoid
Don’t apply sealant or filler to wet or dirty surfaces—it simply won’t bond. Avoid working in extreme temperatures. Don’t overfill cracks to the point where they create ridges—they should be flush or slightly below the surface after curing.
Skipping the cleaning step is the biggest mistake of all. Proper prep accounts for 80% of repair success.
Preventing Future Cracks and Maintenance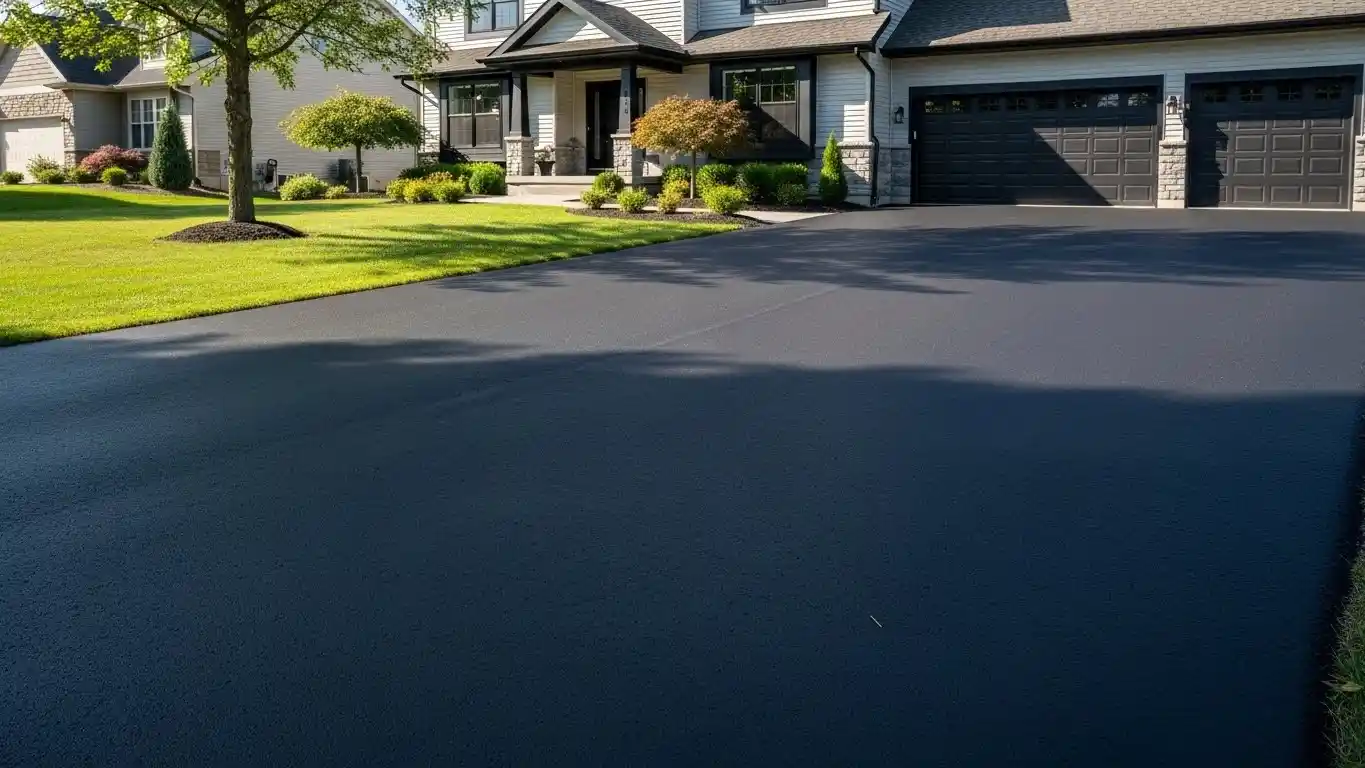
Repairing cracks is just the beginning. Without ongoing maintenance, you’ll be back out there patching again in a year or two. A little preventive care goes a long way toward extending the life of your blacktop.
Preventing cracks and maintaining smooth surfaces
Keep water away from your driveway—it’s the root cause of most damage. Make sure your driveway slopes away from structures and that gutters direct water elsewhere. Fill in any low spots where water pools.
Avoid parking heavy vehicles in the same spot repeatedly. In winter, use calcium chloride or sand instead of rock salt, which can damage asphalt.
Regular asphalt maintenance tips
Inspect your driveway at least twice a year—spring and fall are ideal. Look for new cracks, soft spots, or deteriorating areas. Address small issues immediately before they become major problems. Sweep regularly to prevent debris buildup.
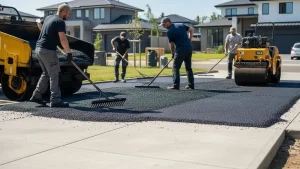
Sealcoating basics
Sealcoating protects asphalt from UV damage, water penetration, and chemical spills. Plan to sealcoat your driveway every two to three years. Don’t sealcoat brand-new asphalt—wait at least six months to a year.
Apply a sealcoat on a warm, dry day with no rain in the forecast for at least 48 hours. Two thin coats are better than one thick coat. Always fill cracks before sealcoating.
Get Expert Help for Blacktop Crack Repair
If repairing cracks feels overwhelming or your driveway has larger, deeper damage, it may be time to call in a professional. SS Paving provides expert blacktop crack repair, patching, and sealcoating services designed to extend the life of your asphalt. Our team can evaluate your driveway and recommend the most effective solution. Book an appointment today or call us to get your driveway repaired the right way.
Conclusion
Repairing cracks in your blacktop driveway isn’t complicated, but it does require attention to detail and patience. By understanding the types of damage you’re facing, gathering the right materials, and following a methodical repair process, you can restore your driveway’s appearance and structural integrity for a fraction of what professionals charge.
Regular maintenance and timely crack repair will keep your asphalt looking good and functioning well for years to come. If you’re facing extensive damage or aren’t confident tackling the job yourself, don’t hesitate to reach out to a local paving professional for an assessment.
Frequently Asked Questions
Can I repair blacktop cracks myself, or do I need a professional?
Small, narrow cracks can often be repaired with DIY crack filler and basic tools. However, large cracks, alligator cracking, or areas with structural damage usually require professional repair to prevent the problem from returning.
What is the best product for repairing cracks in blacktop?
Liquid crack fillers work best for hairline and narrow cracks, while cold asphalt patch is ideal for wide cracks and potholes. Choosing the right product depends on the size and depth of the crack.
How long do blacktop crack repairs last?
DIY repairs can last a few years if done correctly, but professional crack repair and sealcoating typically last longer because of proper preparation, high-quality materials, and expert application.
What is the best time of year to repair cracks in blacktop?
Spring and fall are the best times to repair blacktop cracks, as moderate temperatures allow fillers and sealants to cure properly. Avoid repairing during extreme heat, freezing temperatures, or rainy conditions.
When should I replace my driveway instead of repairing cracks?
If your driveway has widespread alligator cracking, deep structural damage, or repeated failures after repairs, replacement or resurfacing may be the better long-term solution. A professional inspection can help determine the most cost-effective option.