


Your driveway takes more time than almost any other part of your property. Every single day, it’s affected by UV rays that break down the asphalt binder and by water seeping into tiny cracks, which can freeze and expand in winter. On top of that, oil drips from your car and eats away at the surface, and the weight of vehicles grinds everything down. Without protection, that smooth black surface you paid good money for can turn into a cracked, faded mess in just a few years. But here’s the thing – sealing your blacktop driveway isn’t some mysterious process that requires a professional crew. You can absolutely do this yourself over a weekend and add years to your driveway’s life.
In this guide, I’ll walk you through everything you need to know about sealing your blacktop driveway. You’ll learn when it’s the right time to seal, what materials you actually need, how to prep the surface properly, and the step-by-step process to get professional-looking results.
Why Sealing Actually Matters
So, asphalt driveways… Here’s what you need to know. When they’re first installed, they look amazing – dark, smooth, and clean. But asphalt is basically a mix of rocks and sand held together with a petroleum-based binder. That binder is what gives your driveway its flexibility and water resistance.
The problem is that the binder breaks down over time. Sunlight is the biggest enemy. UV rays oxidize the asphalt, making it brittle and gray. Water gets into the surface and works its way deeper through tiny pores. When winter hits and that water freezes, it expands and creates cracks. Those cracks let in more water, and the cycle continues until you’re looking at potholes and serious damage.
Sealer creates a protective layer over your driveway. Think of it like sunscreen for your asphalt. It blocks UV rays, fills in small surface imperfections, and creates a waterproof barrier. A properly sealed driveway can last 15-20 years or more, while an unsealed one might need major repairs in just 5-10 years.
When Should You Seal?
Don’t seal too early. If your driveway is brand new, wait at least six months to a year before sealing. New asphalt needs time to cure properly. After that first seal, you’ll want to recoat every 2-3 years. You’ll know it’s time when the surface starts looking faded or gray instead of deep black.
Timing during the year matters too. You need warm, dry weather. Most sealers require temperatures above 50°F for at least 48 hours after application. Spring and summer are your best bets. Check the forecast and make sure you’ve got at least two days of dry weather ahead.
Gathering Your Materials
You don’t need a ton of fancy equipment for this job. The sealer itself comes in two main types. Coal tar sealer is the traditional choice – it’s durable and holds up really well, but some areas have banned it because of environmental concerns. Asphalt emulsion sealer is the alternative. It’s not quite as durable but it’s more eco-friendly and works fine for most driveways.
Figure out how much you need by measuring your driveway. Most 5-gallon buckets cover around 250-400 square feet. Two coats is always better if you’ve got the time and budget.
You’ll also need:
- A driveway broom or power washer for cleaning
- Crack filler for any damage (get the rubberized kind)
- An application brush or squeegee
- Edge tool or regular paintbrush for tight spots
- Gloves and old clothes you don’t mind ruining
- Caution tape to keep people off while it dries
Prep Work Makes All the Difference
This is where most DIYers mess up. You can’t just slap sealer on a dirty driveway and expect good results. The prep work is honestly more important than the actual sealing. Start by clearing everything off your driveway. Then sweep the entire surface really well. Get all the leaves, dirt, and loose debris off. You want to see the actual asphalt.
Next, tackle the weeds. Any vegetation growing in cracks needs to go. Pull them by hand or use a weed killer a few days before you seal. Now here’s where it gets important: you need to degrease any oil spots. Regular sealers won’t stick to oil. Use a degreaser designed for driveways or even dish soap with hot water and scrub those spots hard. For really stubborn stains, you might need an oil spot primer before sealing.
Power washing is the best way to clean your driveway, but a garden hose and stiff broom works too. The goal is to remove all the dirt, moss, and loose material. Let everything dry completely – and I mean completely. That usually takes at least 24 hours, maybe longer if it’s humid.
Fixing Cracks and Holes
You can’t seal over big cracks and expect them to disappear. Take the time to repair damage first. For cracks smaller than a quarter inch, you can usually just fill them with crack filler. It comes in squeeze bottles or caulking tubes. Clean out the crack first with a wire brush, then apply the filler and smooth it with a putty knife.
Bigger cracks and holes need more attention. For anything larger than half an inch, use a cold asphalt patch product. Clean out all the loose stuff, tamp in the patch material, and pack it down firmly. Some people use a tamper tool, but you can also just drive your car over it a few times once it’s in place.
Give all your repairs at least 24 hours to cure before sealing. Some products need longer, so read the labels.
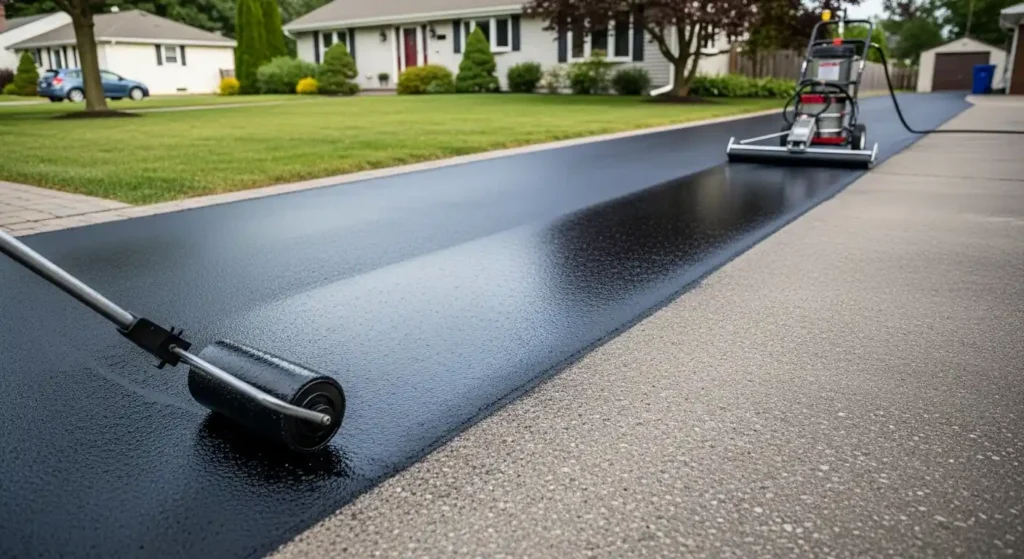
Actually Applying the Sealer
Okay, your driveway is clean, repaired, and completely dry. Now comes the fun part. First, mix your sealer really well. The solids settle to the bottom and you need everything mixed evenly. Some people use a drill with a paint mixer attachment.
Start at the top of your driveway (the part closest to your garage) and work your way down toward the street. This way you’re not trapping yourself. Pour out a line of sealer across the width of your driveway, then spread it with your squeegee or brush. Use overlapping strokes to make sure you’re getting even coverage.
Don’t make it too thick. A thin, even coat is better than one thick coat. The thick application looks good at first but it can crack and peel. You’re aiming for a layer that’s about the thickness of a credit card.
Pay special attention to the edges. Use a smaller brush to cut in along the garage door, walkways, and the sides of the driveway. These areas need good coverage because they’re where water tends to collect.
For a second coat (which I really recommend), wait for the first coat to dry. Most sealers need 4-8 hours between coats. Apply the second coat perpendicular to the first if possible – if you went up and down the driveway on coat one, go side to side on coat two.
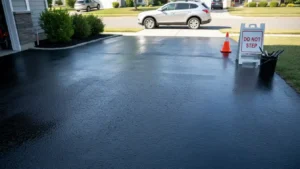
Drying and Curing
Here’s where patience comes in. The sealer might look dry after a few hours, but that doesn’t mean it’s ready for traffic. Most sealers need at least 24 hours before you can walk on them and 48-72 hours before you drive on them. Cool temperatures or humidity will slow down drying time. It’s better to wait too long than not long enough.
Put up barriers or caution tape to keep people and pets off. Trust me, footprints in fresh sealer are really annoying to fix. And a car driving on partially cured sealer can leave permanent tire marks.
Making It Last
You just put in all this work, so let’s talk about keeping your newly sealed driveway looking good. Don’t use harsh chemicals on it. Road salt in winter is okay, but heavy deicers can break down sealer faster. Keep it clean by sweeping off leaves and debris regularly. They hold moisture against the surface and can cause early breakdown. If you get oil drips from your car, clean them up quickly.
Avoid sharp turns with your steering wheel when the car’s not moving. That grinding action can wear through sealer faster in those spots. Reseal every 2-3 years. Your driveway will tell you when it’s time – when it starts looking gray or faded, that’s your cue.
Take Action Before It’s Too Late
Ready to protect your driveway investment? Don’t wait until those small cracks turn into expensive repairs. Check out our complete driveway sealing guide for the top-rated products and video tutorials that’ll walk you through every step. Not sure if your driveway is ready? Grab our free driveway assessment checklist – it takes just 5 minutes to figure out exactly what you need. Your future self will thank you for taking action today instead of facing a total replacement bill down the road.
Conclusion
Sealing your blacktop driveway isn’t complicated, but it does require some effort and patience. The work you put in now – cleaning properly, fixing cracks, applying even coats, and letting it cure fully – pays off with a driveway that looks better and lasts years longer.
The biggest mistakes people make are rushing the prep work or applying sealer in bad weather. Take your time with each step. Wait for the right conditions. Don’t skip the crack repair.
Your driveway is a big investment in your property. A weekend of work every few years keeps it protected and looking good. Plus, there’s something satisfying about pulling into your driveway and seeing that fresh, dark black surface knowing you did it yourself.
FAQs
Can you seal an old, really damaged driveway?
You can seal an old driveway, but there are limits. If it’s covered in huge cracks or alligator-pattern cracking, the sealer won’t fix that. For minor wear and small cracks though, sealing will definitely help extend its life.
What if you mess up the application?
If you catch it while it’s still wet, you can sometimes add more sealer and rework it to even things out. Once it dries, you’re kind of stuck with what you’ve got until the next recoating in a few years.
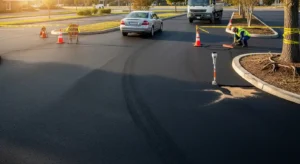
Is it better to hire someone or do it yourself?
For a standard residential driveway, DIY totally makes sense and saves you several hundred dollars. If you follow the steps and take your time, your results will be pretty close to professional work.
Should you seal in spring or fall?
Spring and early summer are usually best because you’ve got warm weather ahead for proper curing. Fall can work too, but you’re racing against dropping temperatures.
Does sealer really prevent cracks?
It prevents small surface cracks from forming by protecting against water and sun damage. But it won’t prevent cracks from bigger issues like ground settlement or tree roots. Think of it as preventive maintenance, not a miracle cure.