

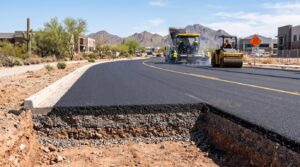
Learning how to seal coat a driveway can help you protect an asphalt surface from sun, water, oil, weather, and normal wear. The basic process includes cleaning the pavement, repairing small cracks, preparing the sealer, applying thin and even coats, and allowing enough time for the surface to cure.
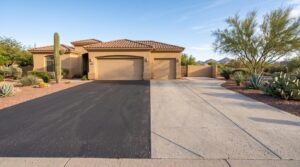
For homeowners in Phoenix, AZ, driveway maintenance is especially important because strong sunlight and high temperatures can speed up asphalt oxidation. S&S Paving & Construction provides professional sealcoating and pavement maintenance for asphalt surfaces throughout Phoenix and the surrounding area.
Sealcoating may look simple, but preparation matters just as much as application. Sealer will not correct potholes, deep cracks, sinking pavement, or a weak base. Before you begin, make sure the asphalt is still in good enough condition for a protective surface treatment.
What Is Driveway Sealcoating and Why Does It Matter?

Driveway sealcoating is the process of applying a protective coating over an existing asphalt surface. The coating creates a barrier between the asphalt and outside conditions such as sunlight, moisture, fuel, oil, and daily vehicle traffic. It can also restore the dark, even appearance of faded blacktop.
Asphalt naturally becomes lighter and more brittle as it ages. Sunlight and oxygen slowly affect the asphalt binder that holds the pavement together. Sealcoating can slow this surface wear when the pavement underneath is still stable.
The main benefits of driveway sealcoating include:
- Helping protect asphalt from UV exposure
- Reducing direct water exposure
- Improving the appearance of faded pavement
- Helping protect against minor oil and fluid spills
- Making routine surface cleaning easier
- Supporting a preventive pavement maintenance plan
Sealcoat is not a structural repair. It cannot rebuild damaged asphalt or correct problems below the surface. If your driveway has serious cracking, potholes, drainage problems, or sinking areas, repairs should come first.
When Should You Seal a Driveway?
The best time to seal coat an asphalt driveway is during a period of warm, dry, stable weather. Both the air and pavement need to meet the temperature requirements listed by the sealer manufacturer. You also need enough rain-free time for the material to dry and cure.
Many common driveway sealers perform best when temperatures are above roughly 50 to 55°F, but product requirements vary. Some products need warmer conditions. Others are designed to cure at lower temperatures. Always follow the label instead of using one temperature rule for every product.
Avoid sealcoating when rain is expected, the pavement is wet, strong wind may blow dust onto the surface, or temperatures will fall below the product’s limits. Very hot pavement can also make application harder because the sealer may begin drying before you can spread it evenly.
How Often Should a Driveway Be Sealcoated?
There is no schedule that works for every driveway. Traffic, climate, pavement age, previous coatings, shade, drainage, and surface condition all affect how often sealing may be needed.
S&S Paving & Construction notes that asphalt in Phoenix may commonly need sealcoating every two to four years, depending on factors such as pavement age, sun exposure, traffic, and previous maintenance. Do not seal simply because a certain number of years have passed. Inspect the surface first.
Can You Seal a Brand-New Asphalt Driveway?
New asphalt needs time to cure before a sealcoat is applied. Applying sealer too soon can interfere with this aging process. Several driveway coating manufacturers recommend allowing new asphalt to cure for at least six months or through a full summer season before applying a coating. Always follow the paving contractor’s advice and the specific sealer manufacturer’s instructions.
Check Your Driveway’s Condition Before Sealcoating
Walk over the entire driveway before buying materials. You are looking for problems that could prevent the sealer from bonding or indicate that the pavement needs more than surface maintenance. A driveway may be a good candidate for sealcoating when the asphalt is structurally stable but looks faded, gray, dry, or lightly worn. Small cracks may also be repaired before the coating is applied.
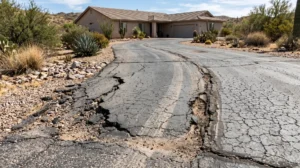
Pay closer attention if you see potholes, loose asphalt, deep depressions, standing water, crumbling edges, or connected cracks that form a pattern similar to alligator skin. Sealcoat will cover the surface visually, but it will not repair these deeper problems. A professional asphalt inspection may be a better choice when a large part of the driveway is failing.
What You Need to Seal Coat a Driveway
Gather everything before you start. This reduces delays once the sealer has been opened and application begins.
|
Category |
What You May Need |
Why You Need It |
|
Driveway sealer |
Asphalt or blacktop sealer designed for your driveway |
Creates the protective surface coating |
|
Cleaning supplies |
Broom, blower, hose, pressure washer, stiff brush |
Removes dirt, leaves, dust, and loose material |
|
Stain treatment |
Asphalt-safe cleaner or degreaser |
Helps remove oil and grease that may affect bonding |
|
Repair materials |
Crack filler and asphalt patch material |
Repairs suitable cracks and minor damaged areas |
|
Application tools |
Squeegee, sealer brush, or approved roller |
Spreads the sealer across the pavement |
|
Mixing tools |
Mixing stick or approved drill mixer |
Keeps the product consistent before application |
|
Edge protection |
Painter’s tape, plastic, boards, or drop cloths |
Protects concrete, garage floors, walls, and curbs |
|
Safety equipment |
Gloves, work shoes, protective clothing, eye protection |
Helps protect you while handling materials |
|
Traffic control |
Cones, tape, barricades, or buckets |
Keeps vehicles and people off the curing surface |
Check the product label before choosing an applicator. Some sealers are designed specifically for a squeegee, brush, roller, or spray system.
How to Prepare a Driveway for Sealcoating

Good preparation can make the difference between an even finish and a coating that starts peeling or wearing away early.
Remove Dirt, Leaves, and Debris
Move vehicles, trash cans, planters, toys, hoses, and other objects away from the driveway. Sweep the full surface with a stiff broom or use a leaf blower.
Pay close attention to cracks and pavement edges where loose dirt often collects. If needed, wash the driveway to remove embedded dirt. Let all standing water disappear before moving to the next step.
Clean Oil and Grease Stains
Sealcoat may not bond well over heavy oil, fuel, grease, or automotive fluid stains. Treat these areas with a cleaner or degreaser that is suitable for asphalt. Scrub the stain according to the product directions and rinse the area when required. A deeply contaminated section may need additional treatment or repair instead of simply being covered with sealer.
Fill Cracks and Repair Minor Damage
Clean loose material from cracks before applying crack filler. Use a repair product that is made for asphalt and suitable for the width and type of crack you are treating.
Do not assume the driveway sealer itself will fill every crack. Hairline surface imperfections are different from open or moving cracks. Potholes and badly broken areas need proper asphalt repair before sealcoating.
Trim Grass and Edge the Driveway
Grass and weeds growing over pavement edges can interfere with application. Trim vegetation back and expose the full edge of the asphalt. Remove weeds growing through cracks instead of sealing directly over them. Clean edges also make it easier to create a neat finished line.
Allow the Surface to Dry Completely
Do not trap moisture under the sealer. After washing the driveway or completing repairs, allow enough drying and curing time based on the products you used. Check shaded areas and cracks carefully because they may stay damp longer than open pavement.
How to Seal Coat a Driveway Step by Step

Once the driveway is clean, repaired, and dry, you can begin the application process.
Stir and Prepare the Sealer
Read the complete product label before opening the container. Stir the sealer until the material has an even consistency. Some products settle during storage and require more mixing than others. Do not add water, sand, or other materials unless the manufacturer specifically tells you to do so.
Protect Edges and Nearby Surfaces
Sealcoat can stain concrete, brick, garage floors, walls, sidewalks, and landscaping. Use tape, plastic, boards, or drop cloths where needed. Be especially careful where the asphalt meets a concrete garage floor or sidewalk. Plan your starting point and your exit before you begin so you do not trap yourself behind a wet sealer.
Apply the First Coat
A common method is to begin near the garage or highest part of the driveway and work toward the street. Pour only enough sealer for a manageable section. Spread the material before pouring more. Trying to cover too much pavement at once can allow the product to begin drying before you create an even finish.
Spread the Sealer Evenly
Use the applicator recommended for your chosen product. Work the sealer across the surface in thin, even passes. Slightly overlap each pass so you do not leave uncovered lines between sections. Avoid puddles, thick ridges, and heavy buildup. More sealer does not always create better protection. Thick applications may take longer to cure and can create tracking or uneven areas.
Apply Additional Coats if Needed
Some sealers recommend one coat while others work best with two thin coats. If a second coat is needed, wait until the first coat has dried for the amount of time listed on the label. Some installers apply the second coat in a different direction from the first to improve uniform coverage.
Finish the Edges and Touch Up Missed Areas
Check around the garage entrance, driveway edges, repaired cracks, and transitions. Carefully touch up light spots while the surrounding coating is still workable. Avoid repeatedly brushing or squeegeeing material that has already started to dry because this can leave visible marks. Remove protective materials carefully.
Let the Driveway Dry and Cure
Block the driveway immediately after application. Keep vehicles, delivery drivers, children, pets, bicycles, lawn equipment, and foot traffic away for the required period. A surface can look dry before it is strong enough to support a vehicle. Follow the manufacturer’s reopening time instead of judging the coating only by appearance.
How to Apply Driveway Sealer With a Squeegee or Sprayer
A squeegee is a common choice for smaller driveways because it gives you more control over the thickness and coverage of the sealer. Pour a small amount onto the asphalt, then spread it in thin, and even pass. Slightly overlap each pass to avoid bare spots, and do not leave puddles or heavy buildup.
A sprayer can cover larger areas more quickly and may create a more even finish when used correctly. It is often better suited for professional work because overspray must be controlled around walls, sidewalks, vehicles, and landscaping. Whichever method you use, follow the sealer manufacturer’s directions and apply the product evenly across the entire surface.
How Long Does Driveway Sealer Take to Dry?

Driveway sealer drying time varies based on the product, temperature, humidity, sunlight, shade, coating thickness, and number of coats.
Some products may allow limited foot traffic within a few hours, while vehicle traffic can require a much longer wait. Many traditional driveway sealers recommend roughly 24 to 48 hours before vehicles return, although faster-curing products also exist. When possible, give the surface more time rather than less. A shaded section near a garage may cure more slowly than pavement exposed to sunlight.
Common Driveway Sealcoating Mistakes to Avoid
Many failed sealcoating jobs can be traced back to preparation, weather, or application errors.
Avoid these common mistakes:
- Applying sealer over dirt or loose debris
- Leaving heavy oil stains untreated
- Sealing wet pavement
- Ignoring cracks or potholes
- Applying sealer during unsuitable weather
- Using an applicator that is not approved for the product
- Applying one very thick coat
- Failing to mix the material properly
- Driving on the surface before it has cured
- Sealing pavement that has serious structural damage
- Applying another sealcoat when the previous coating does not need one
Do not treat sealcoating like paint that can simply cover every problem. The condition underneath the coating still matters.
How to Maintain a Sealed Driveway

Good maintenance continues after the driveway reopens. Clean oil, fuel, and other spills as soon as practical. Sweep away leaves, dirt, and debris that collect near edges or drainage areas. Inspect the driveway several times each year for new cracks, loose edges, depressions, or drainage problems.
Early repairs can keep small pavement issues from becoming larger ones. Avoid placing unusually heavy equipment on areas that were not built to support that weight. Be careful with sharp objects, trailer jacks, motorcycle stands, and other concentrated loads that can damage asphalt, especially during hot weather.
Most importantly, do not apply another sealcoat simply to make the driveway darker. Inspect the condition first and use a maintenance schedule based on actual pavement needs.
DIY Driveway Sealcoating vs. Hiring a Professional
Both DIY and professional sealcoating can make sense depending on the condition and size of the driveway.
When DIY Sealcoating Makes Sense
A DIY project may be reasonable when the driveway is small, structurally sound, easy to access, and has only minor surface wear. You should also have enough time to clean the surface properly, make repairs, follow weather conditions, apply the product evenly, and keep traffic away while it cures.
When to Hire a Professional
Consider professional help when you see large cracks, potholes, sinking pavement, extensive deterioration, drainage concerns, or failed repairs. A contractor can evaluate whether sealcoating is actually the right treatment.
In some cases, crack sealing, patching, resurfacing, or asphalt replacement may be more appropriate. Large driveways may also benefit from professional equipment because maintaining even application across a wide surface can be difficult by hand.
What Professional Sealcoating Can Offer
Professional sealcoating includes more than spreading dark material across pavement. An experienced crew can evaluate surface condition, identify repair needs, prepare the asphalt, select an appropriate application method, control access, and plan curing around weather conditions. This can be especially useful in Phoenix, where pavement may face strong UV exposure, extreme summer heat, blowing dust, and seasonal monsoon rain.
Conclusion
Sealcoating works best as preventive maintenance for an asphalt driveway that is still in sound condition. A successful job starts with inspecting the pavement, choosing suitable weather, cleaning the surface, treating stains, repairing cracks, and allowing every repair to dry properly.
When applying the sealer, use thin and even coats, follow the manufacturer’s instructions, and give the driveway enough time to cure before reopening it. Do not use sealcoat to hide potholes, widespread cracking, settlement, or other structural problems. Fix those problems first so the finished surface has a solid foundation.
Protect Your Asphalt Driveway in Phoenix
If your driveway is faded, cracked, or showing signs of surface wear, sealcoating may help protect the asphalt and improve its appearance. However, deeper cracks, potholes, drainage problems, or sinking areas may need repair before a new sealcoat is applied.
S&S Paving & Construction in Phoenix, AZ provides professional asphalt maintenance and repair services for residential and commercial properties. Our team can inspect the condition of your pavement and recommend the right solution, whether that includes sealcoating, crack sealing, asphalt repair, resurfacing, or other pavement maintenance.
A professional evaluation can help you avoid sealing over damage that needs more serious attention. It can also help you choose the right treatment based on the age, condition, traffic level, and exposure of your asphalt surface.
If you want help protecting your driveway and extending the life of your pavement, contact S&S Paving & Construction today. Call (602) 437-0818 to discuss your project and request an estimate for asphalt services in Phoenix, AZ.
Frequently Asked Questions
How often should you seal a driveway?
Most asphalt driveways may need sealcoating every few years, but there is no single schedule for every surface. Traffic, sun exposure, pavement age, and weather all affect how quickly asphalt wears. Check the driveway’s condition before deciding whether another coat is needed.
What is the best month to seal a driveway?
There is no single best month because weather conditions matter more than the date. Choose a warm, dry period when rain is not expected and temperatures meet the sealer manufacturer’s requirements. In Phoenix, avoid applying sealer when pavement temperatures are extremely hot.
Can you sealcoat a driveway yourself?
Yes, you can sealcoat a small driveway yourself if the asphalt is in good condition. The surface must be cleaned, cracks should be repaired, and the sealer needs to be applied evenly. Large or badly damaged driveways may be better handled by a professional.
How many coats of driveway sealer should you apply?
Follow the instructions for the sealer you are using. Some products need only one coat, while others recommend two thin coats. Applying extra or overly thick coats can increase drying time and may create an uneven finish.
Can you sealcoat over cracks?
Cracks should usually be cleaned and repaired before sealcoating. Driveway sealer is designed to protect the asphalt surface, not replace proper crack filler. Large cracks, potholes, or broken pavement may need professional repair before sealing.
What happens if it rains after driveway sealcoating?
Rain can damage a sealcoat that has not had enough time to dry and cure. It may cause streaks, washed-out areas, uneven color, or weak bonding. Check the weather forecast and follow the manufacturer’s required rain-free period before starting.
How long should you stay off a freshly sealed driveway?
Drying time depends on the product and weather conditions. Many traditional sealers require about 24 to 48 hours before vehicle traffic is allowed. Foot traffic may be possible sooner, but always follow the instructions on the product you use.
Can you seal a new asphalt driveway?
New asphalt should not be sealcoated immediately after installation. It needs time to cure and release oils before a protective coating is added. The required waiting period varies, so follow the paving contractor’s advice and the sealer manufacturer’s directions.
